
Appearance
Drawing a store layout
A store's layout is its plan, drawn to scale: the walls, where the boxes stack or the crop is heaped, which bay each part belongs to, and the doors, fridge units, fans and other equipment. You draw it once, and the stock map for every season is drawn on top of it.
This guide walks through drawing a two-bay box store from scratch, then covers what's different for a bulk store and how to change a layout later.
Before you start
Have these to hand. None of them needs to be exact: you can draw roughly and correct the sizes later.
- The store's inside width and depth, in metres.
- For a box store: how many stacks fit across and how many rows deep, and how high you stack. Potato Diary works out the stack size from the store's Container Type, set when you created the store.
- For a bulk store: where the bulk areas are, and how many tonnes each holds when full.
- The bays. Any bays the store already has are listed in the layout editor, ready to use. You can also add bays as you draw.
Step 1 — Open the layout editor
Open Store Maps. On a store with no layout, click Create layout. To change an existing layout, click ⋯ on its card and then Edit layout.
The editor opens with a card offering three ways to start:
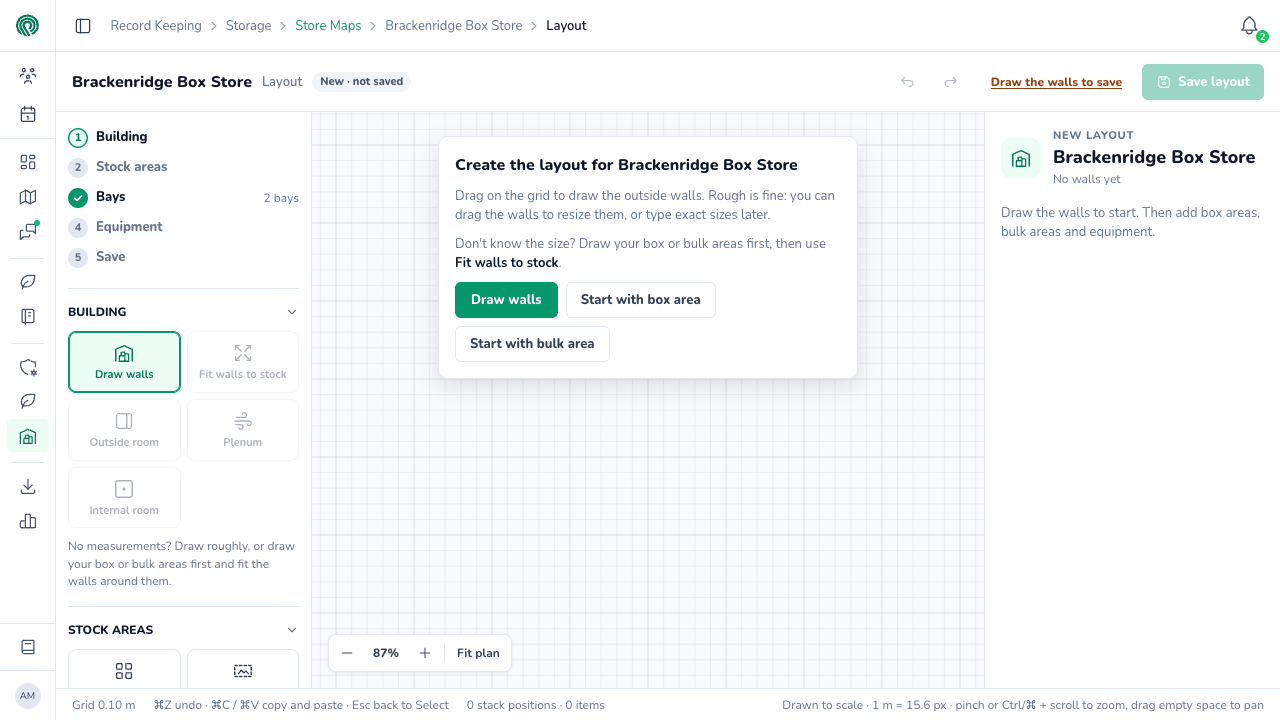
- Draw walls: drag on the grid to draw the outside walls. This is the usual way in.
- Start with box area or Start with bulk area: if you don't know the store's size, draw the stock first, then click Fit walls to stock to put the walls round it.
The screen has three parts:
- On the left, the steps to a finished layout (Building, Stock areas, Bays, Equipment and Save) tick themselves off as you go. Below them are the tools, and then On this layout, a list of everything you've drawn.
- In the middle is the plan. Scroll with Ctrl or ⌘ held, or pinch, to zoom; drag empty space to move around; click Fit plan to see the whole store.
- On the right are the settings for whatever you've selected.
Step 2 — Draw the walls
With Draw walls picked, drag a rectangle on the grid. Rough is fine. When you let go, the walls are selected and the Building settings open on the right.
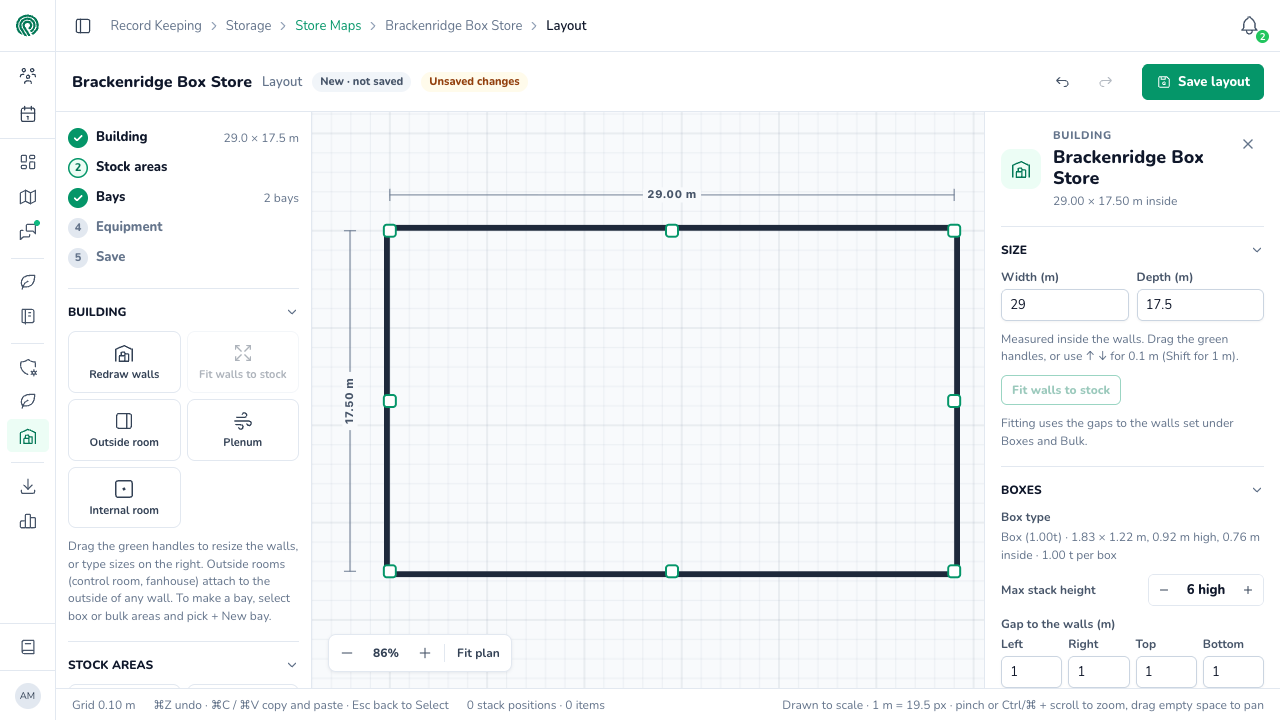
| Setting | What to enter |
|---|---|
| Width (m) / Depth (m) | The size inside the walls. You can also drag the green handles on the plan. |
| Box type | Set by the store's container type. It shows the box's size and how many tonnes it holds. |
| Max stack height | The most boxes you stack in this store. Each box area can be lower. |
| Gap to the walls (m) | The space you leave between the boxes and each wall. Fit walls to stock uses these gaps. Bulk has its own gaps, as bulk crop often goes right up to the wall. |
Further down are a Summary of the floor area and stack positions, Notes, and Display switches for the measurements along the walls.
Step 3 — Draw the box areas
A box area is a block of stack positions. Under Stock areas in the tools, click Box area, then drag on the plan where the boxes go. The area fills with as many stack positions as fit.
The box area's settings open on the right:
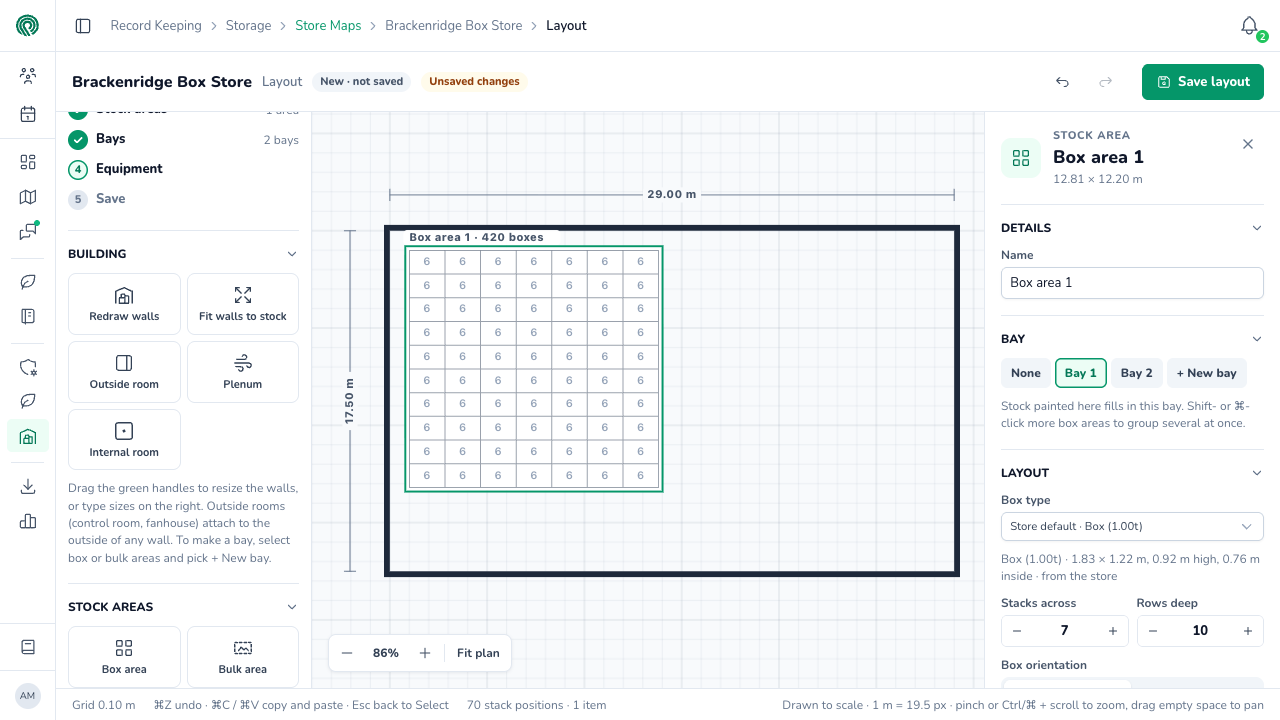
| Setting | What to enter |
|---|---|
| Name | Box areas are numbered for you. Rename them if your team calls them something else. |
| Bay | Which bay this area is in. See Step 4. |
| Box type | Leave it on Store default unless this area uses a different box. |
| Stacks across / Rows deep | How many stacks fit side by side, and how many rows from back to front. |
| Box orientation | Length across or Length deep · 90°, depending on which way the boxes face. |
| Stack height | How many boxes high this area is stacked. Click Set individual stacks to paint a different height onto single stacks, for example lower stacks under a fridge unit, or 0 where a pillar stops you stacking at all. |
| From left wall (m) / From top wall (m) | Where the area starts. You can also drag the area on the plan. |
Each bay usually has its own box area. To draw a second one the same size, click Duplicate at the bottom of the settings, then move the copy into place.
TIP
A duplicated box area is called Box area 1 copy. Rename it under Name so the plan and the PDF read sensibly.
Step 4 — Put each area in a bay
The Bay chips on a box or bulk area say which bay its stock belongs to. Click the bay, or + New bay to add one. Stock you place on the area later is logged in that bay.
To see a bay's settings, click it under On this layout:
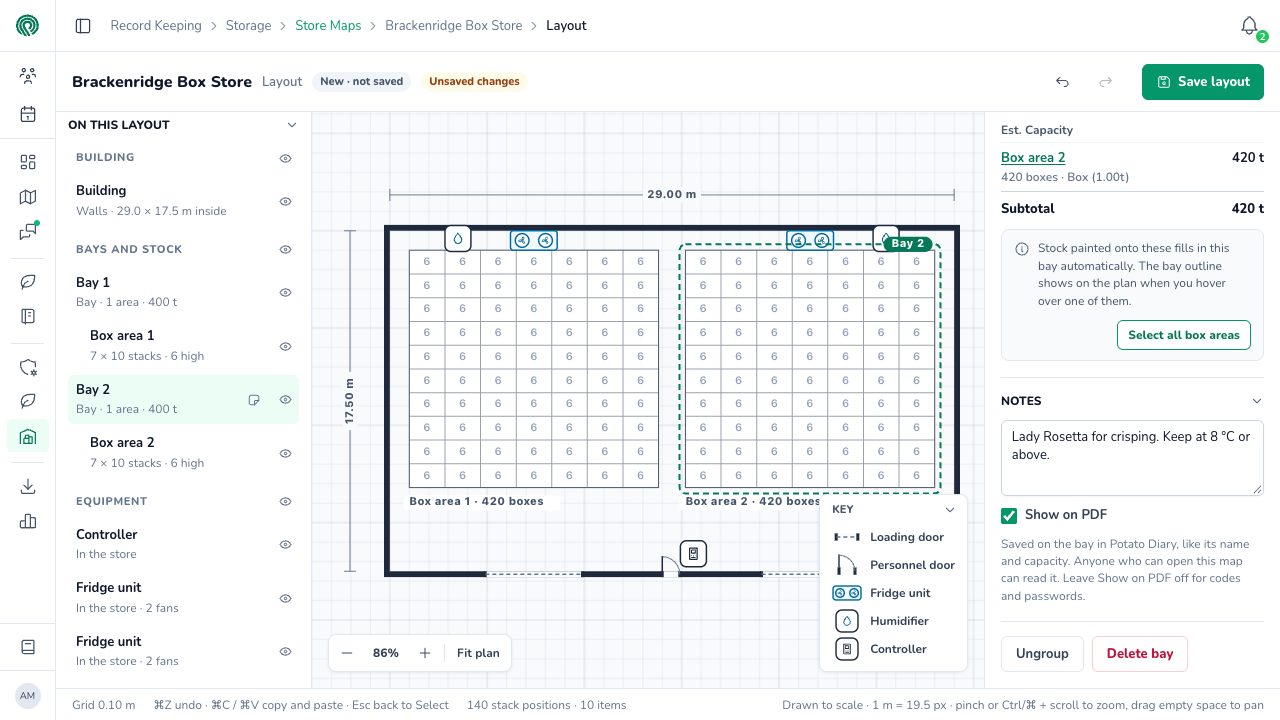
| Setting | What to enter |
|---|---|
| Name / Capacity (t) | The bay's name and how many tonnes it holds. These are the bay's own details in Potato Diary, so they change everywhere the bay appears, such as the bay list on the store's menu. Every bay needs a capacity before the layout can be saved. |
| Box and bulk areas | The areas in the bay, with an estimate of what each holds. |
| Notes | Anything worth knowing about the bay. Tick Show on PDF to print it on the stock map PDF. |
Ungroup takes every area out of the bay but keeps the bay. Delete bay removes the bay itself.
A store can have up to 5 bays.
WARNING
Delete bay takes effect at once, with no question asked. If the bay still has stock logged in it, Potato Diary refuses the whole save when you click Save layout, and says how many stock entries are left. Move or log out that stock first, or undo the delete with Ctrl+Z or ⌘Z.
Step 5 — Add the equipment
Under Equipment in the tools, pick an item and click the plan where it is. Doors and louvres snap to the nearest wall; everything else goes where you click. Pick the tool again for each one you add.
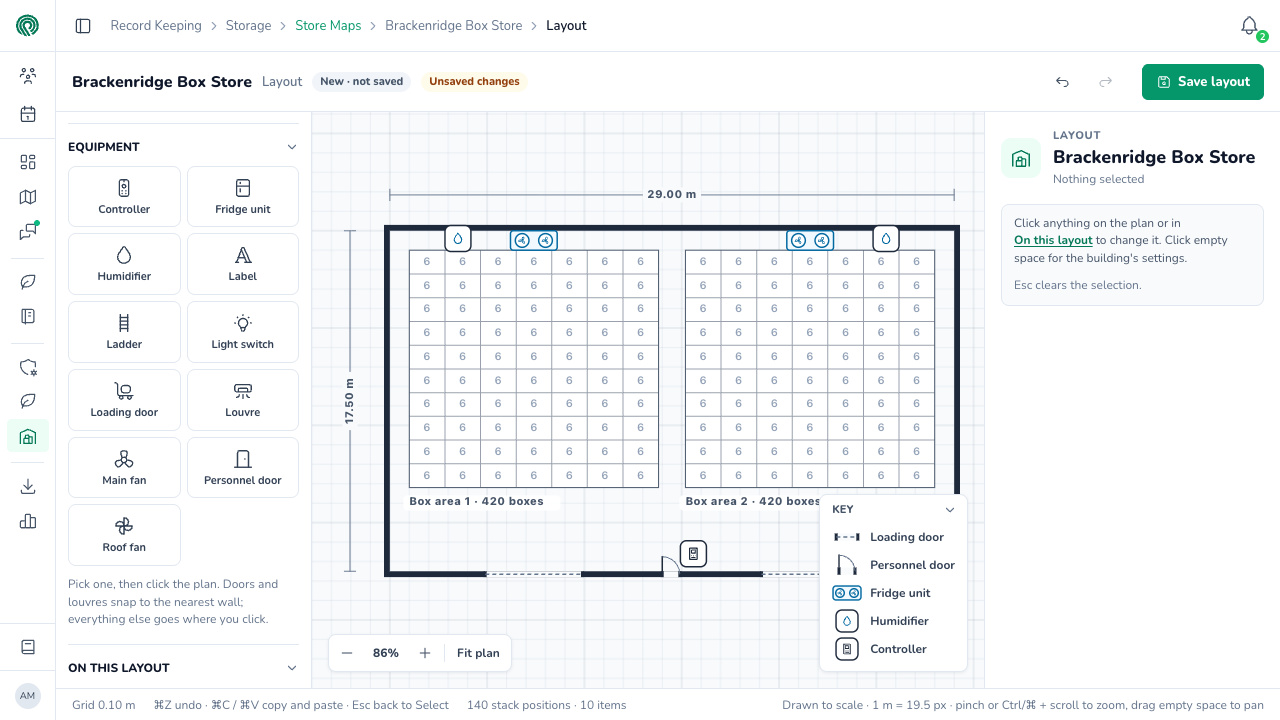
The equipment you can add is: Controller, Fridge unit, Humidifier, Label, Ladder, Light switch, Loading door, Louvre, Main fan, Personnel door and Roof fan. A Label puts your own words on the plan, such as Forklift turning area.
Click any item to change it on the right. A fridge unit has its number of fans. A door or louvre has the wall it's on and its width, and a personnel door also has its hinge and which way it swings. Fridge units, ladders and personnel doors can be turned 90°.
Under Building are three more tools for the shape of the store:
- Outside room: a room against the outside of a wall, such as a control room or fan house. The first one is called Control room.
- Plenum: the air cavity, such as a main duct along the back wall. Stock can't go in it.
- Internal room: a room anywhere, inside the walls, inside an outside room, or outside.
Every item, bay and the building itself has Notes. A note is saved with the layout, and anyone who can open the map can read it, so leave Show on PDF off for alarm codes and passwords.
Step 6 — Save the layout
Click Save layout at the top right. The first save goes straight through, and the header changes from New · not saved to v1.
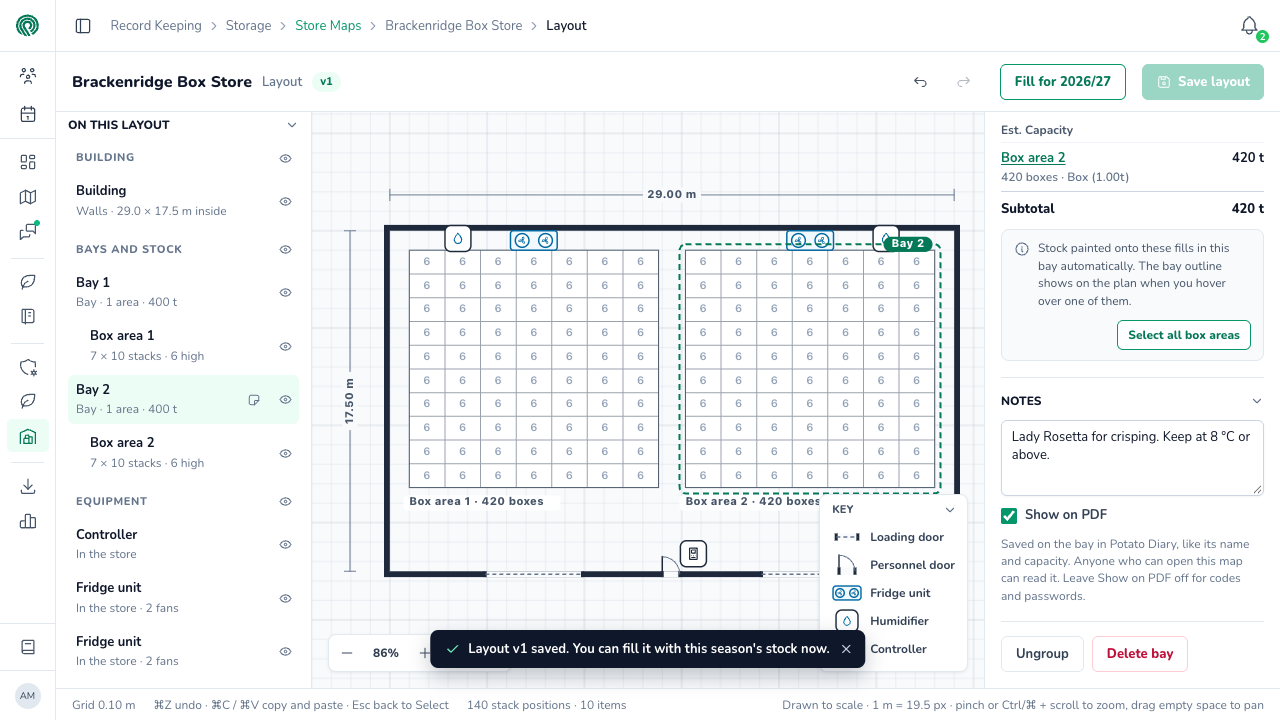
If Save layout is greyed out, a link beside it says why, and clicking the link takes you to the fix:
- Draw the walls to save: the layout has no walls yet.
- 1 item to check: something sits outside the walls or overlaps something else. Select it, and its settings say what's wrong.
- Bay 2 needs a capacity: type a capacity for the bay.
- A store can have up to 5 bays or A layout can have up to 5,000 items: remove some to save.
Once it's saved, click Fill for 2026/27 to start this season's stock map.
Drawing a bulk store
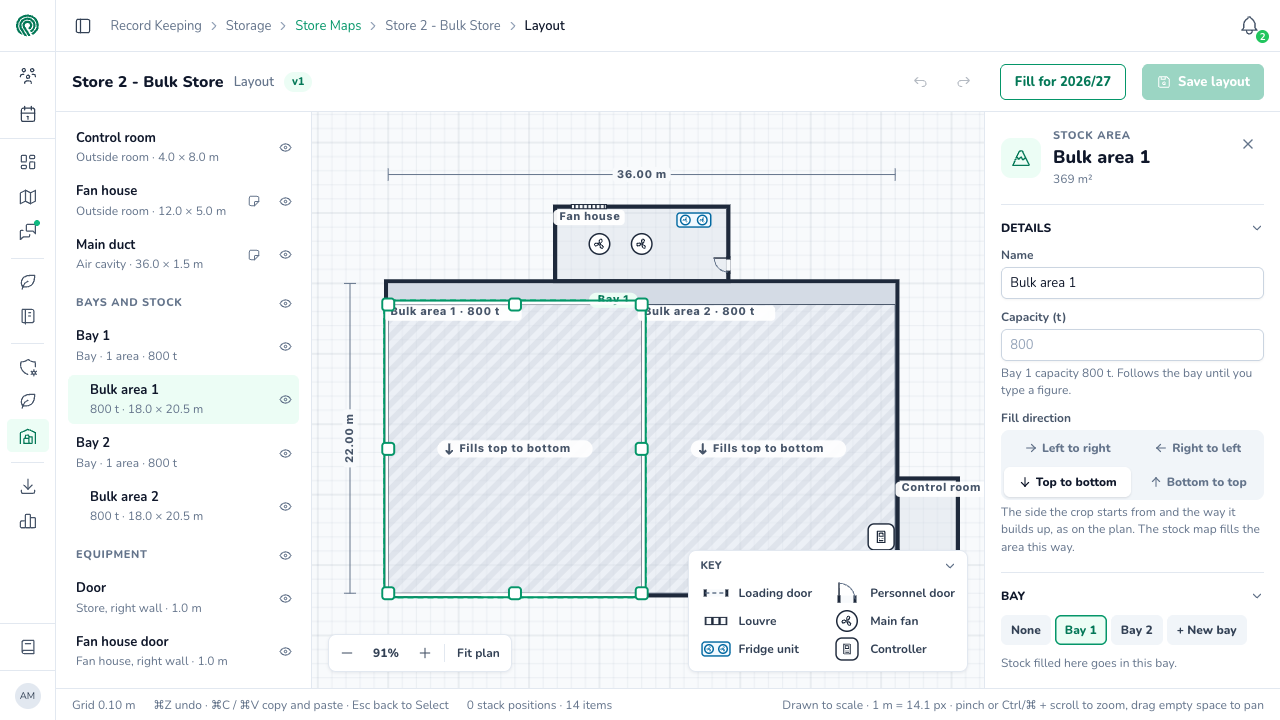
A bulk store is drawn the same way, with a Bulk area in place of each box area. Drag it on the plan where the crop is heaped.
| Setting | What to enter |
|---|---|
| Capacity (t) | The tonnes the area holds when full. Leave it empty and it follows its bay's capacity, less anything in boxes in the same bay. Follow the bay balance goes back to that after you've typed a figure. |
| Fill direction | Which side the crop starts against and which way it builds up, as seen on the plan. Most bulk stores fill from the back wall towards the doors, so a new area fills Top to bottom. |
Add a Plenum for the main duct and an Outside room for the fan house, then the main fans, fridge unit and louvres.
Changing a layout
Open the layout from its card's menu with Edit layout, make your changes, and click Save layout. Each save is a new version: v2, v3 and so on.
If this season's stock map is already drawn on the layout, Potato Diary asks before saving, and says what the change does to the map:
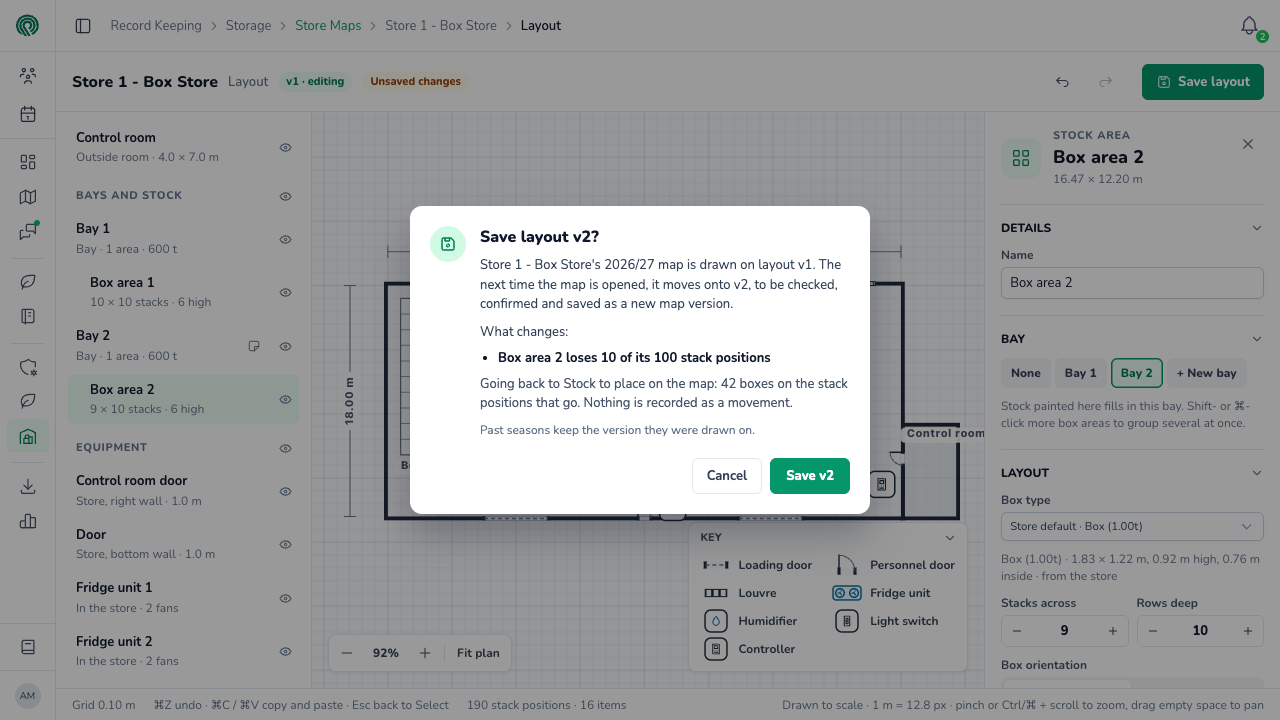
Saving the layout doesn't change the stock map straight away. The next time someone opens the map, it shows the stock on the new layout: stock on stack positions or bulk space that no longer exists goes back to Stock to place, ready to put somewhere else. They check it, click Confirm, and save a version. Until then, the map is locked and its PDF can't be exported. See When the layout changes. Maps from past seasons keep the layout they were drawn on.
INFO
There's no list of earlier layout versions to look back at or go back to. The version number shows on the layout's header and on the store's card menu.
Right-click menus and shortcuts
Right-click anything on the plan, or a row under On this layout, for a menu of what you can do with it:
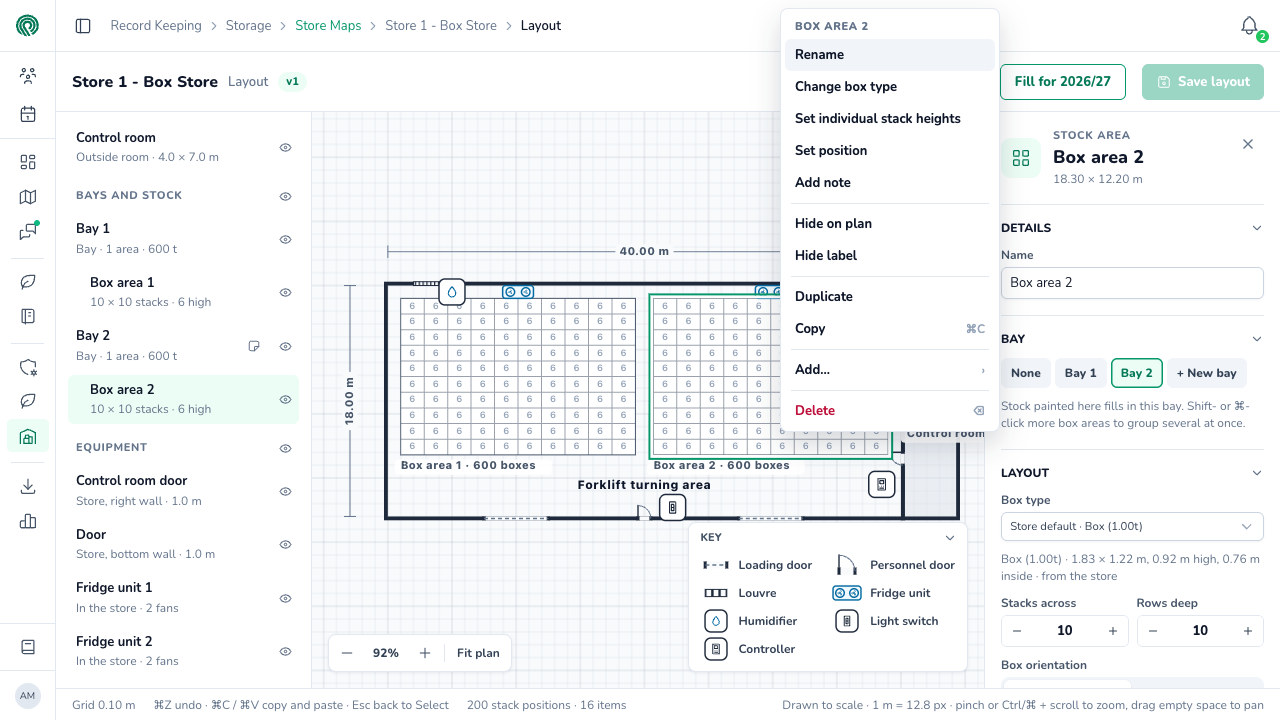
| Shortcut | What it does |
|---|---|
| Ctrl+Z or ⌘Z | Undo. |
| Ctrl+Shift+Z, Ctrl+Y, ⇧⌘Z or ⌘Y | Redo. |
| Ctrl+C / Ctrl+V, or ⌘C / ⌘V | Copy and paste what's selected. |
| Delete or Backspace | Delete what's selected. |
| Arrow keys | Move what's selected 0.1 m, or 1 m with Shift held. |
| Esc | Close a menu, go back to Select, or clear the selection. |
| Shift-click or ⌘-click | Select several items at once, for example to put several box areas in one bay. |
Deleting the walls asks first, and lists what goes with them: the doors and louvres in them, and the outside rooms against them with everything inside. Stock areas and freestanding equipment stay, so you can draw new walls or fit them to the stock.
If you leave the editor with unsaved changes, Potato Diary asks before throwing them away.
Who can change a layout
You need to be able to edit the store. If you can only look at it, the header shows View only and the tools are greyed out. Adding a bay also needs permission to create bays.
A layout belongs to the store, not a season, so it can still be changed when the season is closed.
What's next
- Filling a stock map — place this season's stock on the layout.
- Configuring bays — the bays a layout uses, and how to add them from the store's menu.